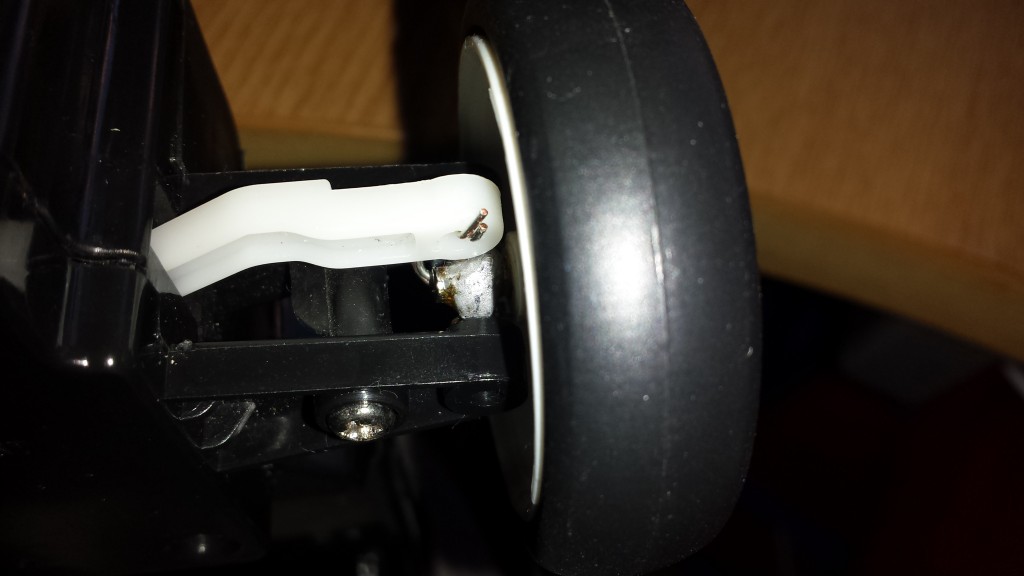
#“My first stab at silicone mould making to cast an RC car suspension part”
Regular readers will know that I’m a huge fan of the Dagu Arexx i-racer RC car. It’s cheap, light, fast, uses Bluetooth, has a removable shell and is perfect for n00b families like us who have never really done the RC thing properly.

Unfortunately after some over-exhuberant use recently, we broke a part of the suspension on one of the front wheels. Over the space of a few weeks I tried everything to fix it without success. That included:
- Trying to hand-mould thermo-plastic onto the remaining suspension member to rebuild the broken bit. It refused to stick
- Supergluing pieces of metalonto the remaining suspension member. They fell off.
- Soldering metal and wire onto the wheel hub to completely replace theremaining suspension member. This worked but was so loose and bendy that the car just drove around in circles.

In the back of my mind I started justifying the cost of a 3D printer even tho I knew they were unsuitable for things that small.
I had pretty much given up when I read a post on Hack A Day about a guy creating new gears for his RC helicopter using silicone moulds and polyurethane resin.
The last time I tried to mould something was when I was about 12 and my sister got one of those castle-making kits where you had to make each “tile” from plastercast in green moulds first and then glue them together. Infuriating thing. What was that called? Can’t figure it out from Google.
But this guy’s approach looked perfect and appeared to make a strong item.
So I ordered some GP-325 RTV Silicone Mould Making Rubber and A2000L Easycast Polyurethane resin from a UK seller on eBay recently and it arrived last week.
I really wasn’t sure how to approach it so I just got stuck in. I removed the matching suspension part from the other wheel and put it in a plastic cup.I then mixed the two parts of the silicone as instructed and poured it over. Due to a rubbish kitchen electronic scales I wasn’t sure if the mix was correct so I let it dry for 24 hrs.
I popped the dry rubber out of the cup and could see the outline of the piece. I gently cut in with a blade and was shocked when the piece came out with no aggro and left behind a really impressive impression. The fact that the central hole was moulded perfectly too was the big surprise.
Phase two was less straightforward. I mixed the polyurethane and poured it into the mould. Despite tapping and squeezing etc, what came out an hour later was pretty stunted. I obviously had big issues with air pockets. So I cut away a bit at the top of the mould to make it easier for air to get out and the mixture to get in.
The second one was better but still not right. More rubber cutting ensued.

The third mix was all wrong and never set.
Fourth time’s a charm and I got a “perfect” copy of the original. Obviously with lots of extra bits which I had to cut away.
I gave it about 16 hrs to cure, just in case.
A tiny amount of trimming and it fit perfectly.
I’m genuinely stunned. I didn’t really expect a great result here but I got exactly what I needed. This method is amazing and so bloody easy.
On the downside, I am concerned about the strength of the cast. Particularly the vertical bit which is what broke in the original too. I’m tempted to do another cast where I run a thin wire in the correct place to add some robustness. Having the mould means I can make as many of these as I like.
Is there any retail outlet in Cork/Dublin that sells the materials to do this kind of moulding? It’d be great to talk to someone who has done lots of it before about improving strength and flexibility and playing with the mix ratios.
I’ll update this when I’ve had a chance to test the car out properly.


