Intro
After the silly complexity and Hackaday article! of last year, I decided to keep it simple for Halloween this year. Of course that worked out :-)
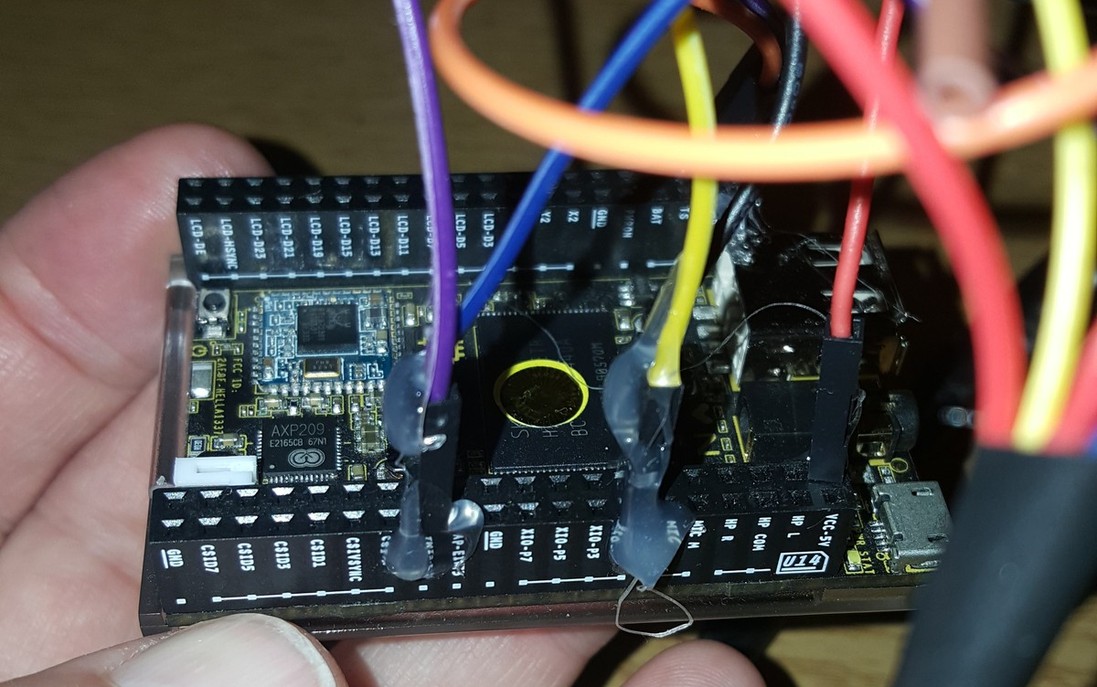
The kids’ favourite thing from all our Halloweens was the doorbell that made scary sounds. So that became the focus. As I hadn’t really done anything with my two C.H.I.P.s, I picked one to handle the bulk of the activity. I immediately became a big fan of its small size, built-in Wifi and simple Linux UI.
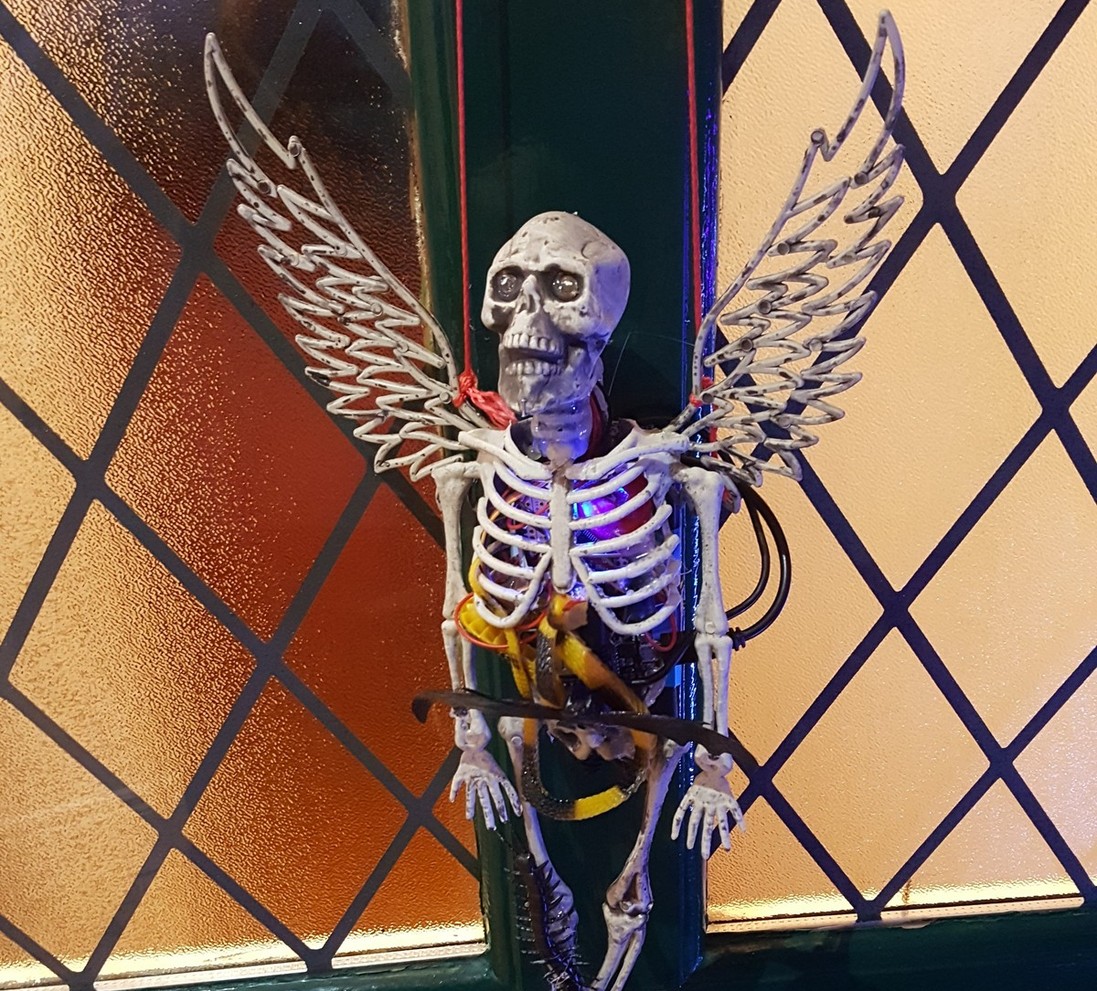
But of course I couldn’t leave it at that. I hauled out an old cheap scary mini skeleton we bought a few years back in Woodies and decided to add him to the mix.
It also wouldn’t be Halloween/Christmas without a touch of the Griswalds, so I added some LED strips to light the way.
The “smoke machines” weren’t great but added another layer of spookiness.
Finally, the disco lights in the entrance pillars were the icing on the cake.
The result was something that seemed to go down very well with all the trick-or-treaters and even had a neighbour come down to check out what was going on.
Code
All of the code is in this repo on GitHub (Arduino, Go, C, STL, F3D) if you don’t want to read further.
Doorbell of Doooooom V2.0
The initial setup for the Doorbell was dead simple. A push-to-make button connected to a GPIO on the C.H.I.P which caused some code to randomly play out various MP3 files over the audio-out to some big speakers cunningly hidden near the door.
The end result was far far more complex than I ever imagined.
-
I decided to use Gobot to handle the pin scanning and calling out to mpg123 to play the mp3 files. Of course I used youtube-dl to download videos from YouTube and then WinFF to convert to MP3 followed by Audacity to clip them appropriately.
-
I had a couple of problems with Gobot initially. The main one was that all of the GPIOs were renamed in Linux 4.4 on the C.H.I.P. So I vendored in Gobot to my project and manually changed them all to be correct. I really such PR my changes on GitHub.
-
Once that was done, the sample code for reading the XIO-P0 pin connected to the button worked perfectly and calling out to mpg123 also worked well. I added a few extra lines of code to ignore multiple button presses during music playing and finally I added a simple http GET to Skeletony’s API end-point over Wifi to get him to do his magic when the button was pressed.
“Please press the button, pretty please”
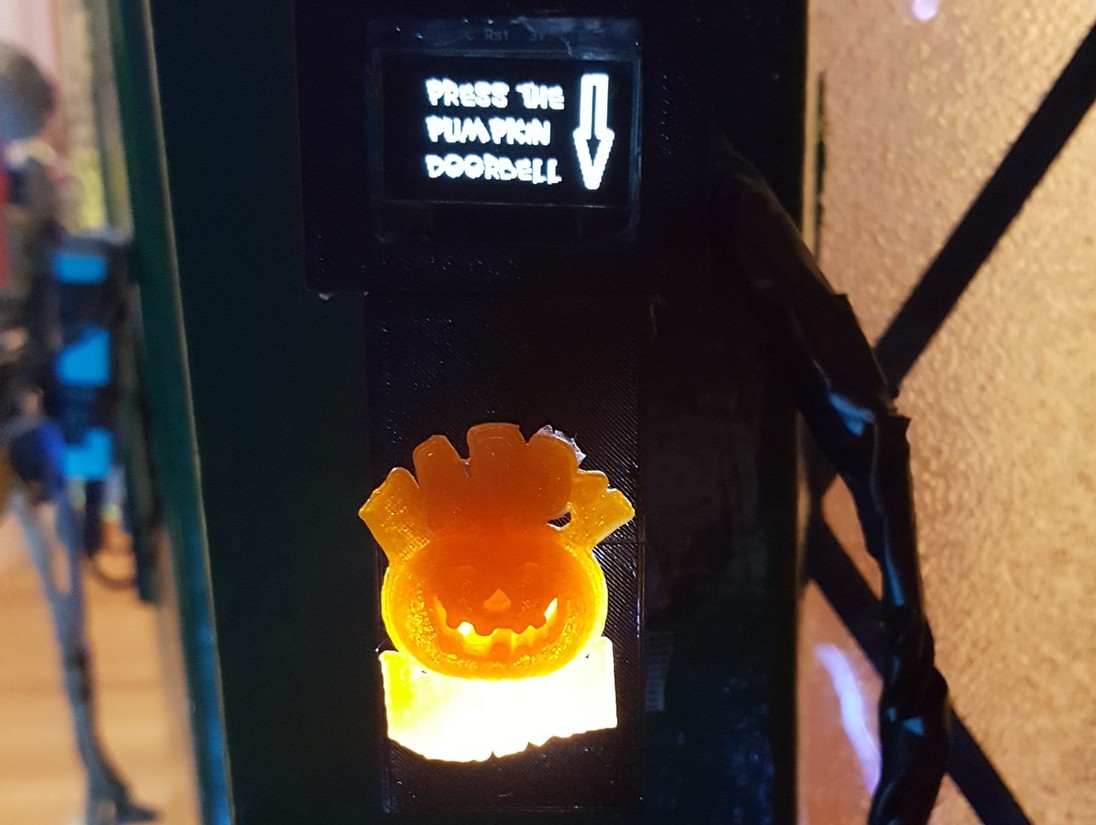
Every year I’ve done a doorbell I’ve had to put up some sort of sign saying “please press the button”. I’ve also had to cover over our normal doorbell to really get people to focus.
This year I thouhgt “I’ll add a simple LCD message to guide people”. Then I thought I’d use my Adafruit OLED screen. Luckily most of the code I needed was out there and it was case of a few evenings of tying it all together.
A very nice person has created https://github.com/vkomenda/ssd1306 which is C code for the SSD1306 OLED display. It basically worked on the C.H.I.P. with some changes for my particular setup.
- I had to use the 2nd I2C port for some reason so I used:
#define SSD1306_I2C_ADDR 0x3D
in ssd1306.h
-
The Adafruit SSD1306 screen also needed to have its reset pin pulled low before it would work. So I added a variation of some code from here to both setup the GPIO pin XIO-P1 correctly and toggle it in ssd1306_demo.c. My final version of that code is here
-
The pin connections from the C.H.I.P to the screen are as follows:
-
I2C SLK - TWI2-SCK
-
I2C SDA - TWI2-SDA
-
VCC - VCC-3V
-
GND - GND
-
RESET - XIO-P1
You then run
make
sudo ./ssd1306_demo /dev/i2c-2
That shows some demo text as an image.
To show your own image you need to create it in Windows Paint (for realz) as a 128x64 monochrome BMP. Here’s mine. Then use LCD Asistant which is a simple Windows tool that takes the BMP file and turns it into a .h file. I then replaced the array in font5x7.h with that one in the generated h file. I re-ran Make and then ran the code. It took a few iterations to get an image I was happy with.
Doorbell Enclosure
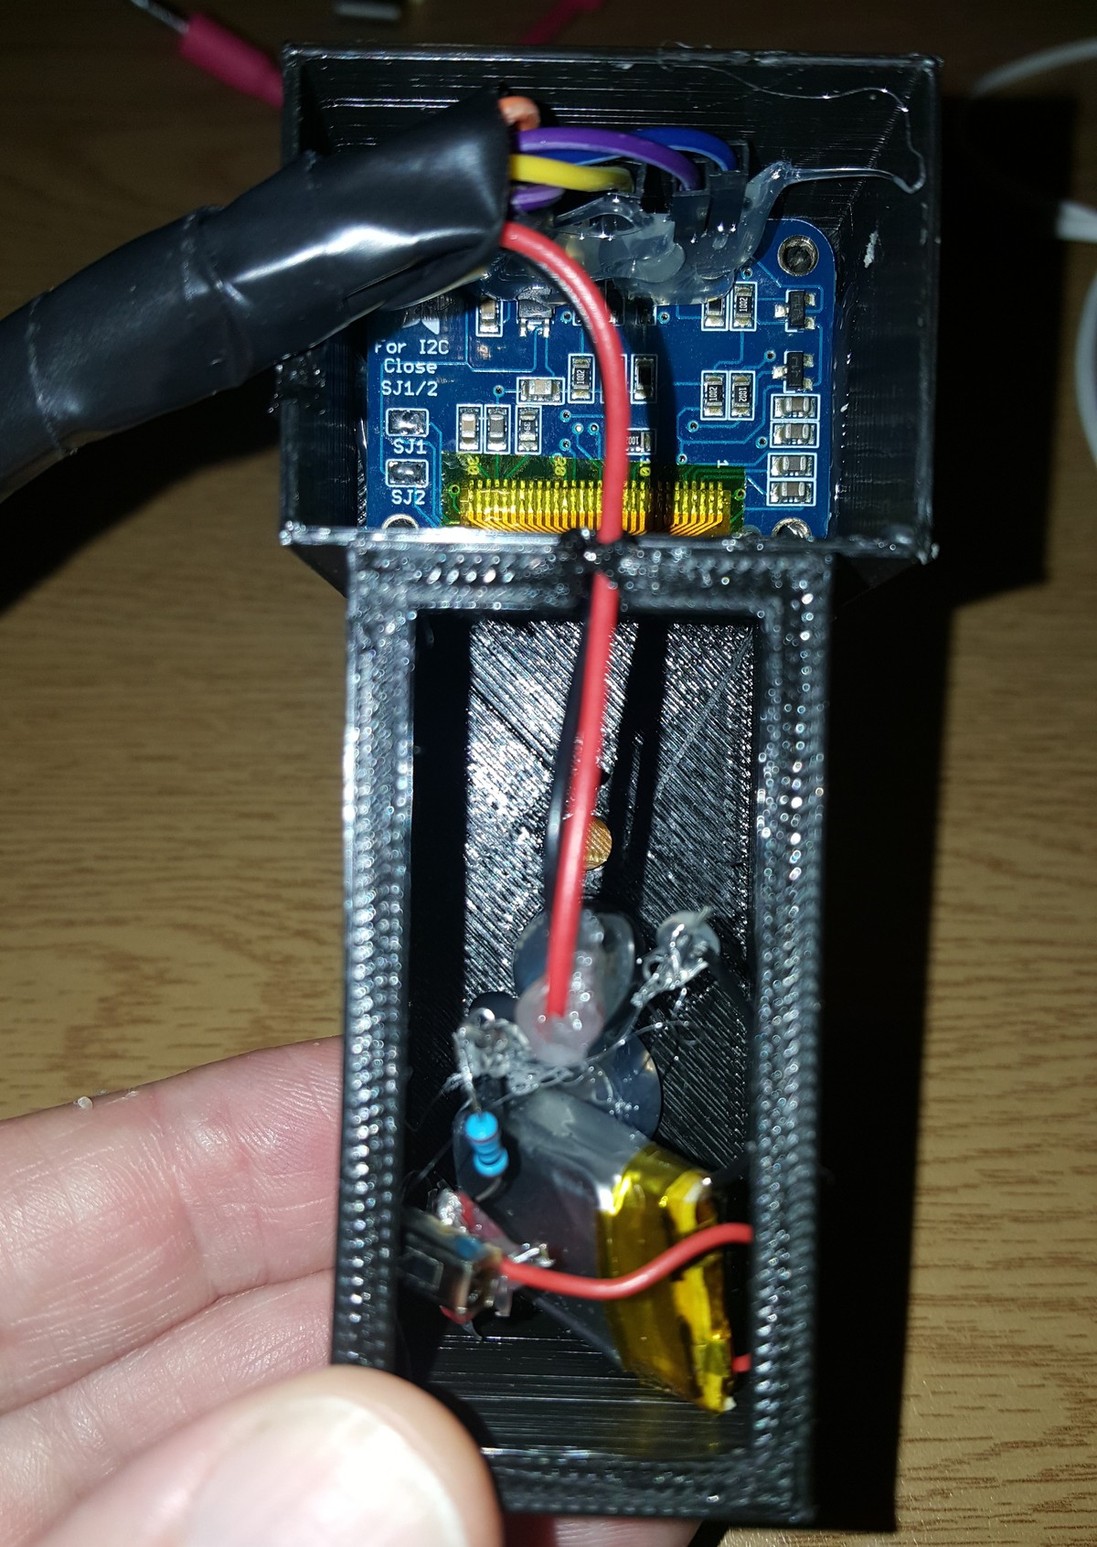
I had a few goes at creating an enclosure for the doorbell button itself in Autodesk Fusion 360. The end-result was fine but not perfect.
- Fusion 360 File
- STL File (love how GitHub shows it in 3D!)
I also printed off a bunch of halloween designs from Thingiverse to act as the think you pushed rather than a raw button. The skull ones were scary but awkward to attach. In the end I used this pumpkin one. But I had to create a simple attachment for it too in Fusion.
I then poked an LED out through a hole I’d designed into the enclosure. Rather than make the wiring any messier. I wired it up to a tiny LiPo battery with a tiny switch. It worked well and lit up the pumpkin nicely, if a little lopsidedly. I then added a small metal nail to the back of the pumpkin to stop the button rotating.
I needed an enclosure for the OLED screen. That worked well but was slightly too big. I forgot to add a cut-out for the wires to escape so a soldering iron was used to melt the plastic.
I ran the wiring for the screen and the switch iself in through the letterbox and had the C.H.I.P. dangling inside and powered by a phone charger.
Skeletony
Now that the main aim of the project was achieved I could relax since if nothing else worked, I still had the doorbell. I thought more about Skeletony and started “upgrading” him in iterations.
Heart
This gave huge bang for the buck. I took this 3D design from Thingiverse and printed it in semi-transparent red. I then dremeled a hole into and and stuck a bright LED in. Then I found some “pulse” Arduino code from here which looked a lot better than simple on-off. Job done.
Eyes
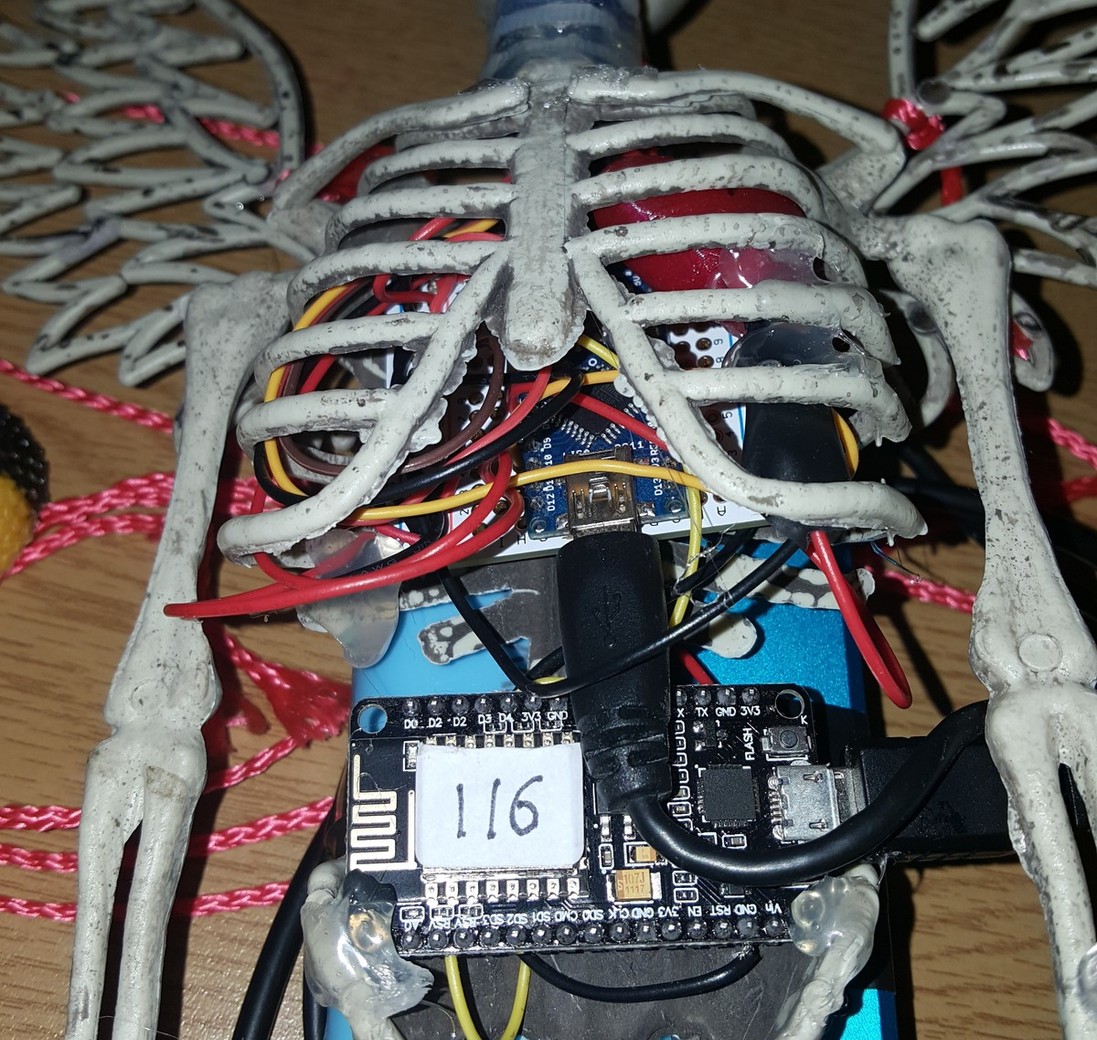
Even easier. Dremel out holes in the eye sockets and stuff two orange LEDs with wires into the holes. Bring wires out to the back of the head. The LEDs are just toggled on/off but due to the power glitching caused by the servo, they actually glowed. So a feature for free.
Head
This glitched a lot but again, huge impact for such a simple idea. I ripped Skeletony’s head off and hot-glued it to a generic dx.com tiny servo. I cable-tied and hot glued the servo onto Skeletony’s spine. The bog-standard Arduino Servo code from here did the job and I just made go 90 degrees, pause and return. The servo was very noisy at rest so I found some good tips on turning it off rather than holding it at a point.
Guts
I hot-glued some creepy crawlies to his belly to hide all of the electronics.
Ears
So at this point we have heart, eyes and head all controlled by an Arduino Nano and kicking off whenever a particular pin was toggled. I could have run some wires from the C.H.I.P around the door frame and onto Skeletony but of course I wasn’t happy with that.
I needed to wifi-enabled Skeletony and we all know what that means - yep our old friend the ESP8266. Over the past year I’ve gone from using NodeMCU Lua to Espruino to Arduino on the ESP. The biggest community seems to be Arduino so that’s what I’ve settled on.
The basic code was trivial really. Run the off-the-shelf server code with a single API end-point. When C.H.I.P calls the end-point, toggle a GPIO pin which in turn is connected to the Arudino Nano and causes all of Skeletony’s shenanigans.
But I’ve also been playing with the fantastic Wifi Manager code for Arduino on ESP8266. It gives you the ability to run the ESP as a Wifi access point, connect to it with your phone/tablet/laptop and configure with the usual access point it should connect to. This means you don’t have to hard-code the SSID/Password into your Arduino code. Awesome!
But I went a step further and spent quite a while figuring out how mDNS works. It’s actually very cool and much more than “DNS”. It meant I could have N Skeletonys all advertising themselves as Skeletonies and then I could dynamically get their IP addresses on the C.H.I.P. and communicate with them. It makes everything extremely flexible.
It all worked beautifully until the day itself and, as ever, something went wrong. In this case it was the mDNS piece only. But some quick hard-coding of IP addresses in the C.H.I.P code at the last minute took care of that.
- My ESP8266 Arduino sketch is here
- All of my Arduino Nano code is here for Skeletony’s head, heart and eyes
- My C.H.I.P Go code is here
I powered him from two USB powerbanks on his back. (The two were an unsuccessful attempt to deal with the servo glitching).
LED strips
Just a quick note about the analogue RGB LED strips I put down to guide people to the door. Wow, did they exceed expectations! They lit up the entire house and make it look extremely spooky. The spookiness doesn’t really come across in the video. These were bog standard 5050 waterproof strips that you can get on DX.com or Aliexpress.

Rotating Lightbulbs
I learned about these from Big Clive on YouTube. His channel is a geek delight and highly recommended. He breaks apart electronic gadgets and lights from eBay and explains how they work. It’s nearly always interesting and he comes across as a thoroughly nice man. I got mine from here on eBay. They worked ok but really aren’t intended for outdoors. They work brilliantly indoors.
Fog/Smoke/Steam Machine
I learned about these devices from NightHawkInLight on YouTube. They were fine but the “fog” was not that impressive. The cheaper ones seemed to work slightly better than the bigger one with the LED. All from eBay obvs.
And finally
Next year? Yeah, next year we go simple. I swear. Says the man who has already set reminders in Google Calendar for purchases and 3D printing in September 2017.